When I moved to the countryside, I took my interest in foraging to a new level, stockpiling blackberries in autumn like they were going out of fashion. (Which, in a sense, they were, as they wrinkled up and dried out come wintertime.) A neighbour with an apple tree kindly hung some fallers on their gate, so I snapped up those too.
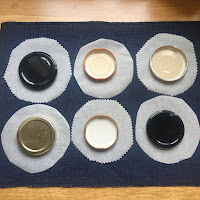
When I found myself with some enforced me-time one weekend – the likes of which we were all familiar with in 2020, after going in and out of lockdown – I decided the time was ripe to make jam. I reused jars that formerly housed things like pesto and honey, and the whole experience was entirely zero waste.
I did a bit of research and put together a method of my very own. This recipe uses blackberries straight from the freezer. I used just four ingredients:
600g frozen blackberries
500g peeled, cored cooking apples chopped into chunks
800g granulated sugar (you could use jam sugar instead)
300ml water
I used quite a lot of equipment, including most of my spoons, so I won't list everything here. The main things you'll need are:
a jam pan (although a big saucepan will do the job)
a ladle
6 or 7 sterilised jars
greaseproof paper
To prepare, I cut seven circles out of the greaseproof paper, about an inch wider in diameter than the jar lids. These were to seal the jars to prevent any mould creeping in during storage.
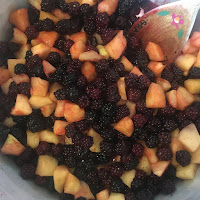
Then, I heated the water in the jam pan and added the apple chunks. I simmered them until they were soft, which only took about 5 minutes. The pan was on the highest heat setting the whole time. I used an electric hob so didn't get fancy with the heat levels. It seemed to work, in any case!
At this point I switched on my oven to 150 degrees C. My jars were freshly washed, and I boiled the kettle and put a dash of boiling water in each jar and lid, then put them in the oven on a baking tray for about 15 minutes to sterilise. You could also do this in a microwave.
I then poured the frozen blackberries into the jam pan. I read somewhere that it's good to keep as much of the juice in the fruit as possible, as this makes richer jam. Defrosting the berries quickly is the key to success here. My cold blackberries did take a while to heat up, but once they got going, I brought the mixture to the boil and kept stirring for about 15 minutes. The apple chunks soon turned a shade of shocking pink.
I then poured in 800g of sugar. It's a lot of sugar! Most recipes suggest using the same amount of sugar as fruit, but I thought I'd try a bit less and see how it tasted. I started with 600g and the jam was a bit sharp. An extra 200g gave it a good level of sweetness. I then boiled the mixture for about 10 minutes, stirring it at the same time.
Once the mixture started to look like jam, I did the classic wrinkle test. If you have a fancy sugar thermometer, this is where you use it, but if not, put a small plate in the fridge for twenty minutes or so. Then, when you think the jam looks set, take it off the heat for a moment and pour a teaspoonful of mixture onto the cold plate. Move your finger through it. If it wrinkles, and a little gap is left behind, then it has set. If the jam trickles back into the space, it hasn't set, so put it back on the heat and test it every few minutes.
And then, you're done! Spoon the jam straight into the sterilised jars – I tried using a funnel but it was a much neater affair using an old fashioned spoon. Tighten the lids, take a picture next to a rainy window, then store the jars somewhere cool until you're ready for a crumpet.


Comments
Post a Comment